![]()
Coroplast Projects
or
The Evolution of Coroplast
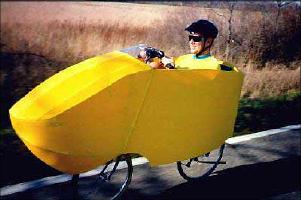 Full Fairing #1 Modelled after Ed Gin's fairing workshop design , this one used a PVC frame with aluminum bracing, and according to my records, was about 3 mph faster than unfaired. Weight was about 10-12 pounds, which strangely didn't seem to hurt me on easy-to-moderate hill climbs. However, it gave the bike a much heavier "feel", so it came off when the weather warmed up. |
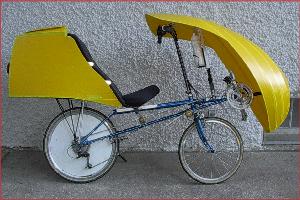
 Full Fairing #2 More streamlined than FF#1, it is also uses aluminum framing, which is better for cold weather reliability. I didn't do any extensive riding with it, but preliminary tests hinted at 8-10 mph speed gains! I found myself riding the brakes at 27 mph a few times. |
|
|
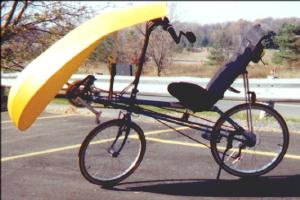 Front Fairing #2 Evolving from the first front fairing, this one had less flat area at the front and wrapped to the side more, too. It was noticeably faster than #1. Large facets caused some buffeting at high speeds, though. |
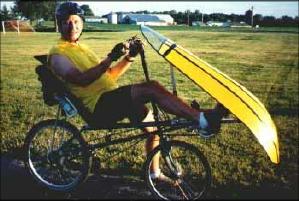
 Front Fairing #3 This looks fast, even standing still! By using narrower strips of Coroplast, I was able to get a better curve. A narrower center strip also allowed even less flat area at the front. I gave it more coverage on top, so I can eventually put a body sock on it. The techniques for making it are shown in the Workshop #1 page. |
|
|
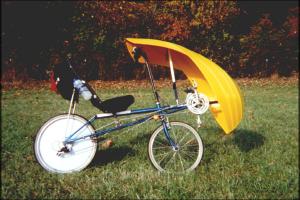
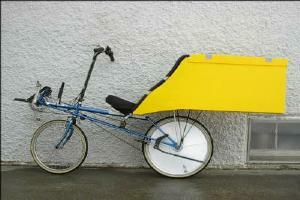 Tailbox #1 My first attempt at a separate tailbox. It attaches to the rear rack with a seatpost Q/R. It's pretty long, due to the shallow closure angle of 6 degrees per side. It is 14 inches wide at the seat and 8 inches at the trailing edge. |
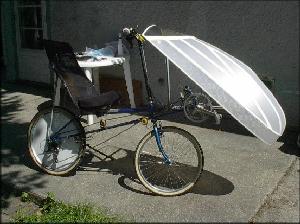
 Tailbox #2 Shown with Front Fairing #3. Number 1 was too long to use in groups, so I shortened it up. I also gave it an arched lid. The rear is a Kammback, only about 4 inches wide. Speed boost is noticeable at speeds over 20 mph. This is the basis for the tailboxes we built at the Tailbox Workshop. |
 Helmet cooler I can't claim credit for this one. As we all know, vented helmets are engineered for upright riders, who tend to have their heads angled down for some reason. Fear not, recumbenteers! TriCORR member Byron has discovered the principle of RAM AIR. Check out the stylish ducted helmet. "You wouldn't believe how cool this makes the helmet," says Byron ""...and it's a real chick magnet., too." |
.![]()
Other projects
![]()