Contact: John Foltz - john.foltz@usa.net
Workshop #2
Coroplast Tailboxes
Saturday, March 17, 2001
9:00 am-4:30 pm
Foster Community Center
Lansing, Michigan
Page 1
Saturday, March 17, 2001
9:00 am-4:30 pm
Foster Community Center
Lansing, Michigan
Page 1
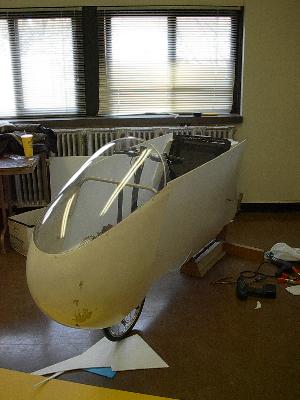
We got started a little late, due in part to my inability to deliver
all the coroplast in one trip, and in part by everyone checking out Rick's
fully-faired homebuilt SWB. Due to construction, we did not get our reserved
room, but instead ended up in the Arts and Crafts room. While it was an
appropriate choice, it was also a little smaller, making for a slightly
cramped work area. For a copy of the handout, click
here.
|
Byron Drachman Karsten Fabian John Foltz Frank Hartman Dave Johnson Del Johnson Dick Martin Joe Mclaughlin Karen McLaughlin Jun Nogami Steve Wasilewski Rick Wianecki |
|
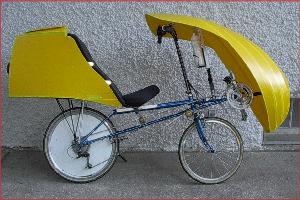
We set Rick in his own corner while he replaced the tub-style body on his homebuilt. In other corners, Byron built a tailbox for his P-38, Frank for his Nimbus, Karsten for his Toxy, and Steve for his Vanguard.
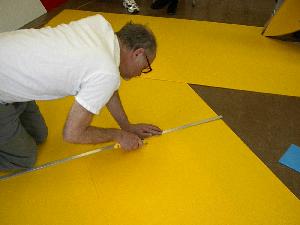
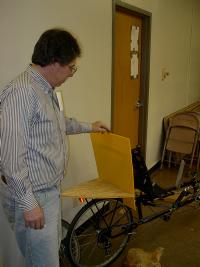
Once we got moving, everyone cut bases for their tailboxes. Steve used plywood to reinforce the bottom, the others just used coroplast. Below left, Byron starts cutting, using a piece of aluminum as a straightedge. Below right, Frank fits his base on his rack. Due to the sprint braces, Frank made a cutout so he could bring the base closer to the seat back. Attaching the bases to the racks was done either with a quick release bolt through the base and rack (use a large fender washer or piece of wood to keep from crushing the coroplast base,) or zip ties. Rick demonstrated his setup, which used a "nutsert", a nut that was attached to the rack base like a rivet. I like the idea; using a wingnut epoxied to the head of a bolt, you could attach the tailbox with no tools and without fuss, all from the inside of the box.
There was some discussion on the best shape for the base. We decided it was best to put a slight convex curve in each side, which would provide a little extra strength, as well as break up the angular look. What they ended up with, then, was shaped somewhat like triangles, with two convex sides, which ran from the front edge of the rack to a location somewhat behind the rear wheel. There was also discussion on whether or not to bring the sides back to a 'point', or make a flat rear surface. We didn't reach a consensus, so Frank ended up with a Kammback, somewhat like mine, and the others brought the sides to a sharp edge. The other option, to use Rick's heat gun and make a rounded back, was rejected by everyone. The rounded back would have been extremely strong and less sensitive to side winds, but not quite as aero.
The next step was to was to cut the front panel, the one which went
behind the seat. Learning from my mistakes, they ran a piece of coro from
the level of the seat base to the desired height, at more or less the height
of their shoulders. Except for Frank, who decided the rack was close enough
to the seat base level that he wouldn't bother. The front panel was the
same width as the front of the base piece, with a cutout so it would slip
over the front of the rack and stays. Steve even made his a little wider
at the top, to help follow his shoulders. While the others ran the flutes
of the coro vertically, Karsten decided to take advantage of the folding
property of the Coro, and run his flutes horizontally. This allowed him
to fold the front piece to follow the contour of his seatback, and left
it with greater strength supporting the sides. Good idea! Here's
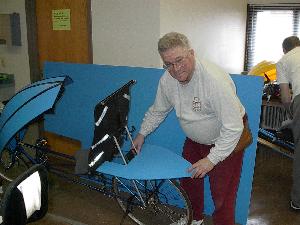
Steve with his front panel held in place. With a little duct tape, it stayed
while he worked on the next step. (Sorry for the moire pattern on the shirt.)